If you click on a link and make a purchase we may receive a small commission. Read our editorial policy.
EVA foam: cosplay armor has never been easier (if you use a cricut)
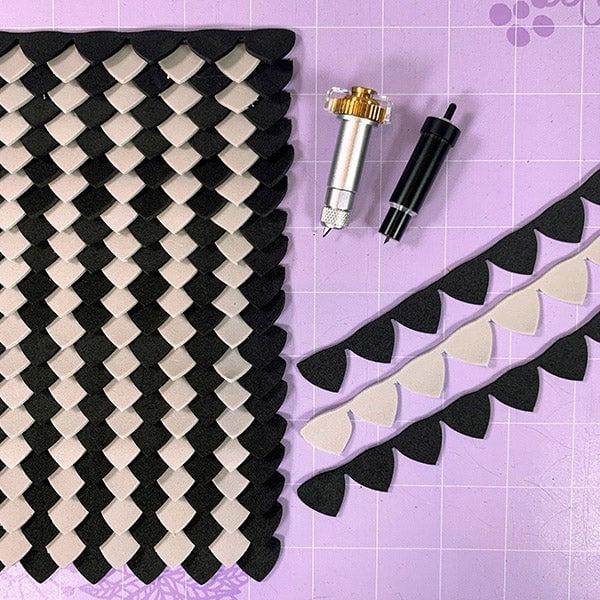
Learn how a cricut can help with your foam cosplay builds by Downen Creative Studios!
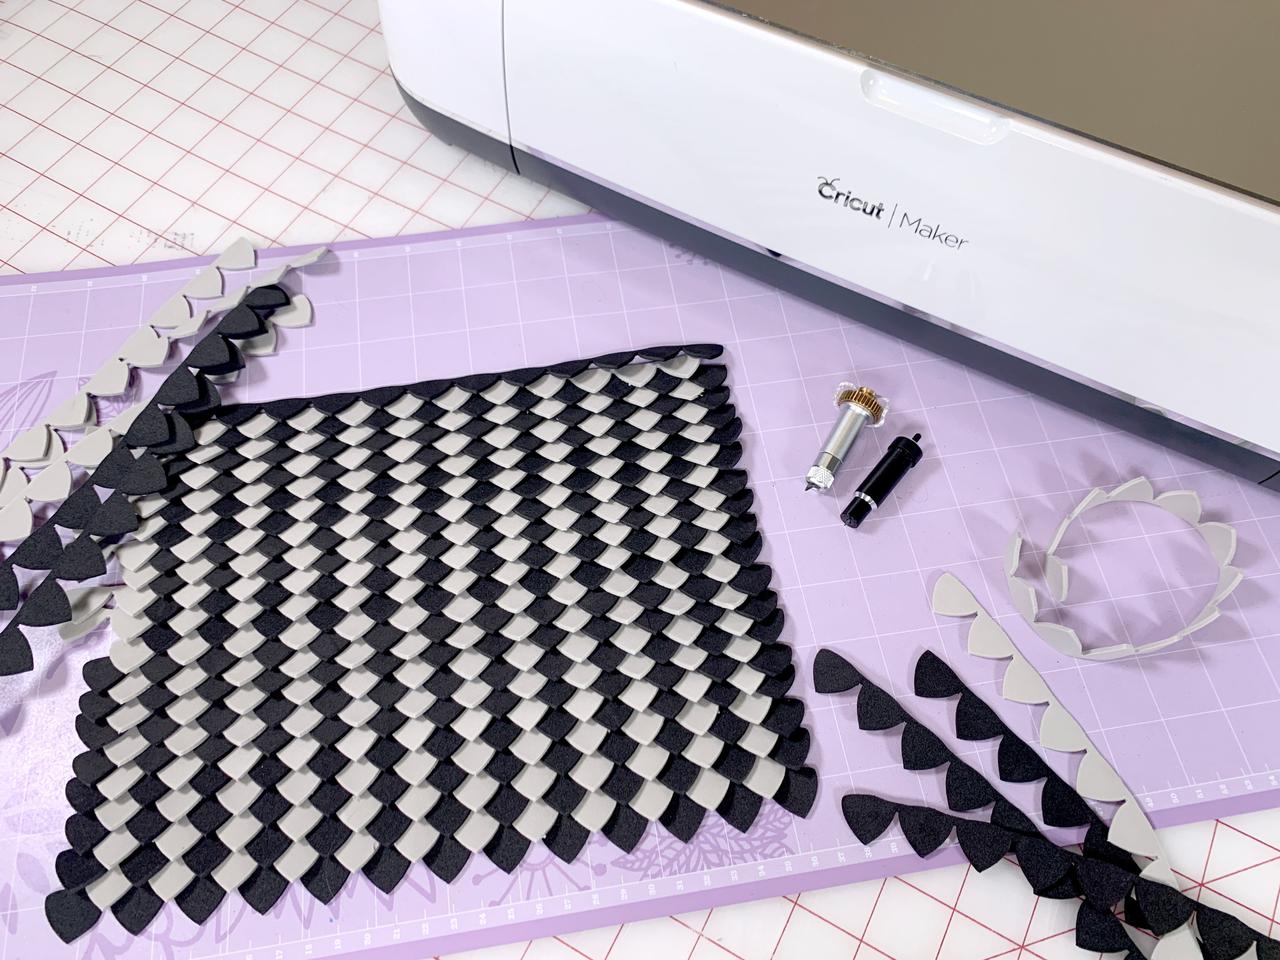

Did you know that it’s easy to cut 2mm EVA foam with a Cricut Maker or a Cricut Explore Air 2? Using a Cricut can help you achieve intricate designs, clean cuts, textures, and is a great way to make repetitive shapes like scales and chainmail!
Please note that this tutorial assumes you have a general idea of how to use Design Space.
A Special Note About Using the Explore Air 2:
The Knife Blade accessory is not compatible with machines other than the Maker. However, you CAN cut Eva foam with the Deep Blade. You can use the settings in this tutorial, and add extra cut passes for the best results. Experiment with what works for your material!
For this tutorial we will be cutting scale strips with the Cricut Maker!
Materials needed:
- 2mm HD-Foam and 2mm EVA 38 foam
- Blue Painter’s Tape
- Knife Blade or Deep Blade
- Cricut Maker
- Strong Hold Mat
- A design in .jpg, .gif, .png, .bmp, .svg, or .dxf format
- 2mm EVA Foam
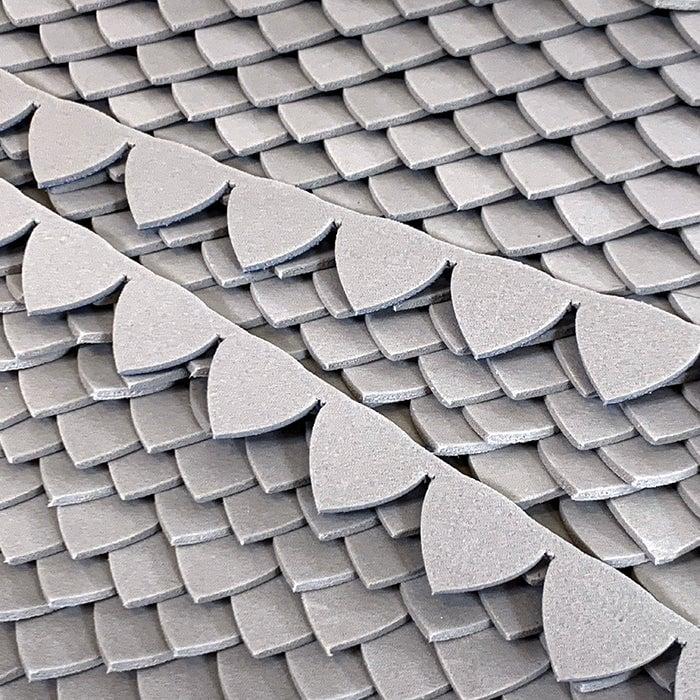
I am using 2mm HD-Foam and 2mm EVA 38 foam from TNT Cosplay Supply. These two foams have slightly different properties, and I have found that using different cutting techniques for each works best.
Step 1: Find a Design!
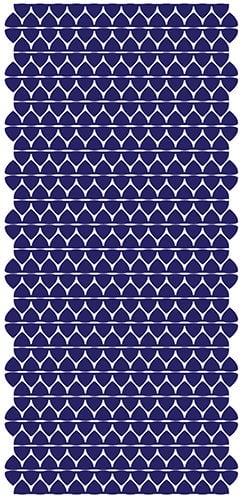

The Cricut comes with free software called Design Space that comes with simple design tools you can use for basic designs. For this tutorial, I am using my own scale designs that I created using Adobe Illustrator.
Step 2: Choose a Sheet Size
These robust machines can cut up to 12” x 24” of material. For EVA foam sheets, I always use a maximum size of 11.5” x 23” to keep the material and design safely within the margins of the rollers. This will also help provide you with enough space along the edges to place a strip of tape for stabilization.
Step 3: Add a Removable Adhesive Layer
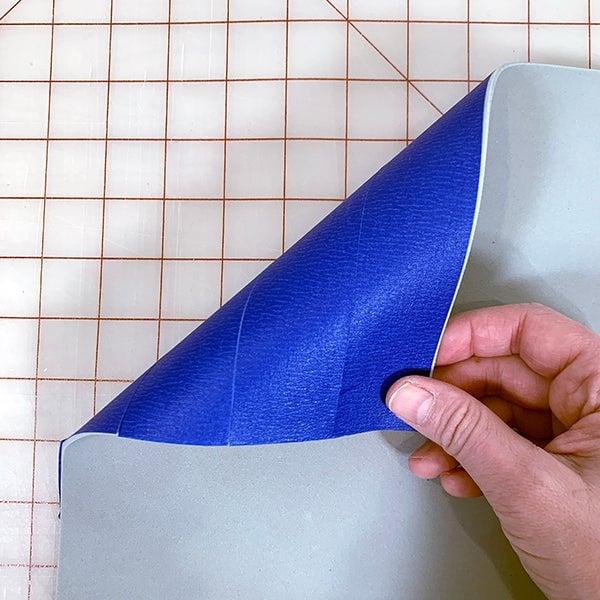
EVA foam has a hard time sticking to a Cricut mat without help. Use a removable layer like blue painter’s tape or removable vinyl sticker sheet to the back of the foam. Avoid using regular masking tape, as it will likely damage the foam when removed.
Step 4: Secure the foam to the mat
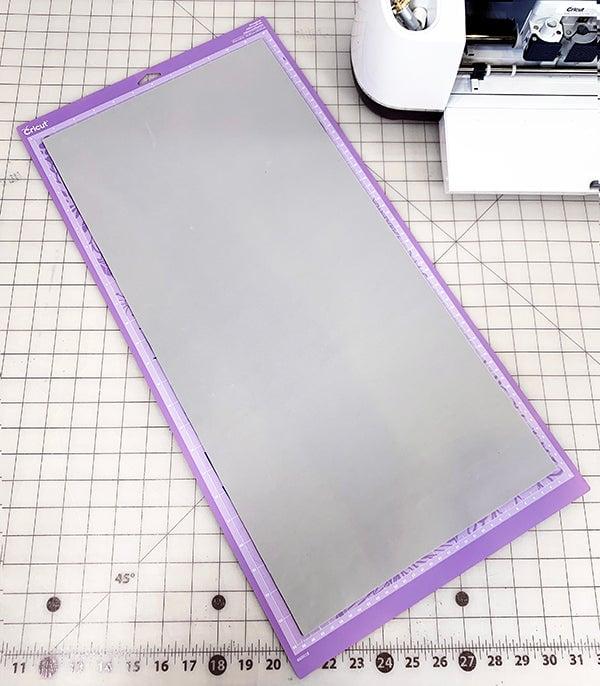
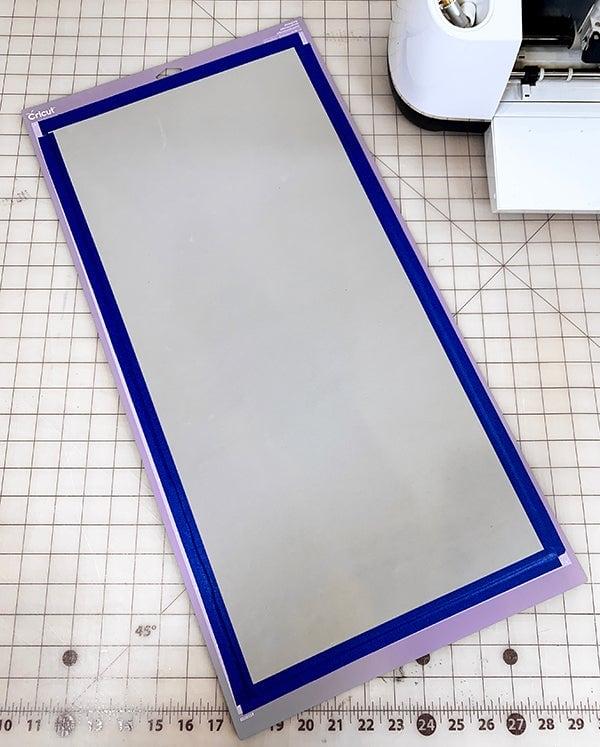
Place the foam on the mat, tape side down, and press firmly, making sure no air pockets are trapped. Add painter’s tape around the edges of the foam. Don’t use regular masking tape, as it will most likely damage the surface of your mat.
Step 5: Choose a Blade and Design Space settings
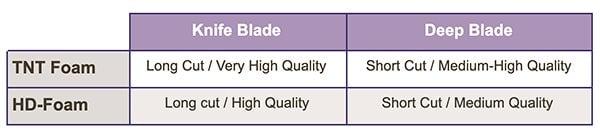
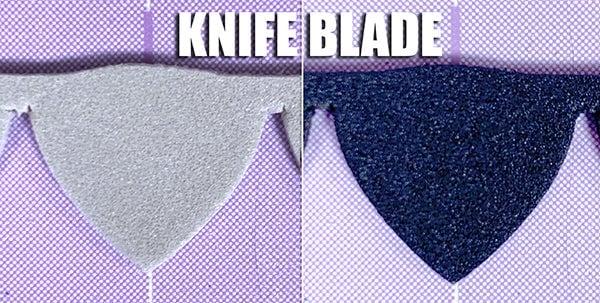
Choosing the right blade is a very important step for your project. Generally, a Knife Blade will result in extremely sharp edges, but takes a long time and requires you to supervise the cut to avoid unnecessary passes that can potentially damage the mat. A Deep Blade will be much faster and doesn’t need supervision, but will most likely result in lower quality work. Experiment with settings and blades to find what works best for your project.
Deep Blade setting: Fast cut time, lower edge quality
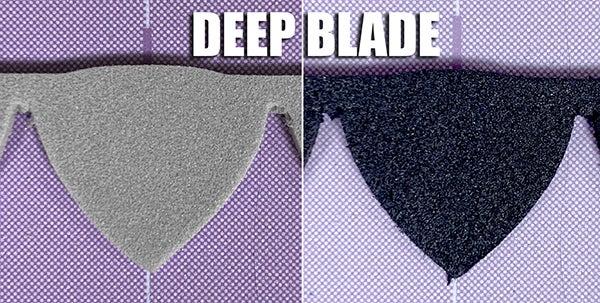
Knife Blade Setting: Slow cut time, higher edge quality
Knife Blade:
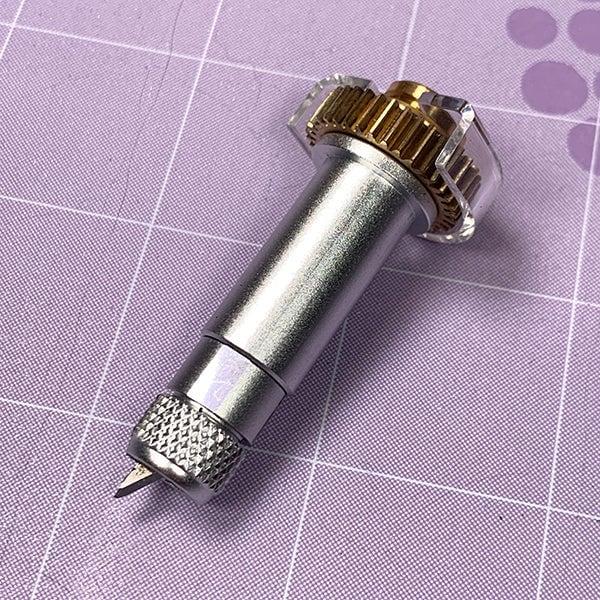
Choose the “Basswood 1/16” preset, and load the Knife Blade. The machine will use pre-programmed settings. These settings cannot be customized at this time.
Deep Blade:
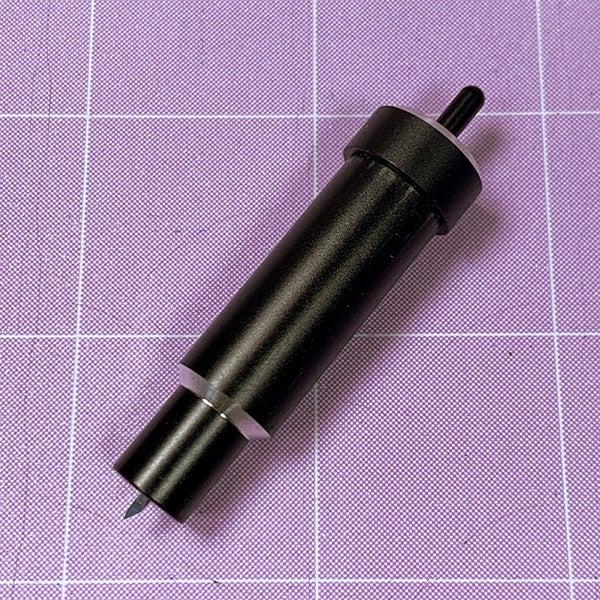
Create a new material setting with the following parameters and load the Deep Blade:

Step 6: Additional Deep Blade Settings
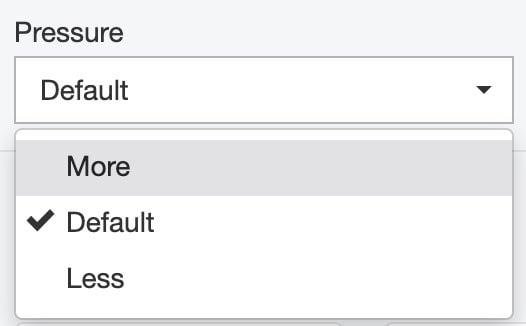
For this project, leave this setting at “Default” pressure.
Step 7: Move the Star Wheels
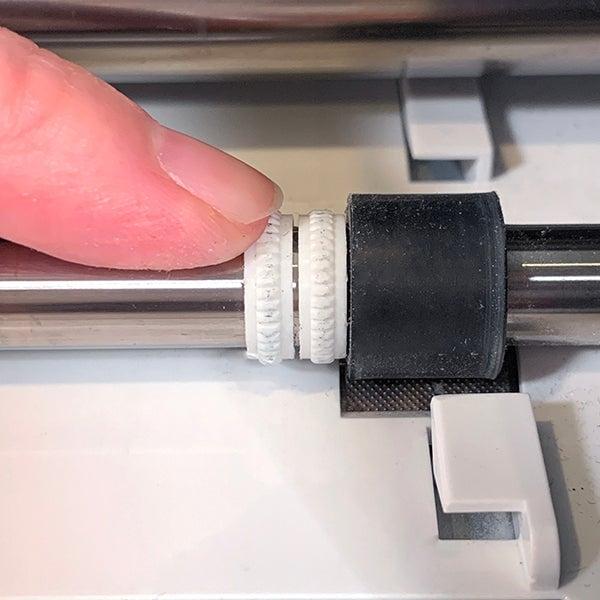
On the Cricut, move the Star Wheels all the way to the side, so there are two on each side. This prevents your material from being damaged. The wheels will be hard to move, but they will eventually slide, I promise!
Step 8: Load the Mat
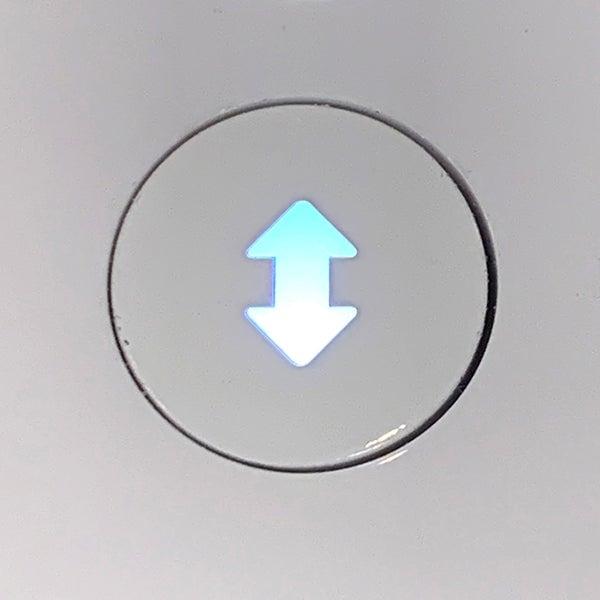
Press the blinking double arrow button to load the mat.
Step 9: Start the Cut
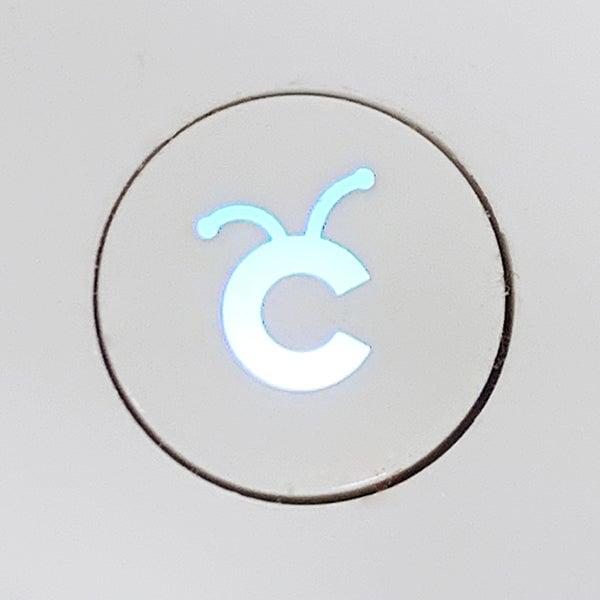
Press the blinking “C” button to start the cut.
Step 10: Check the Cut
You can halt the cut at any time with any blade to check the cut depth by pressing the “Pause” button. The Cricut will stop in place until you press the “C” button to restart the cut. Avoid pressing the double arrow button unless you want to unload the mat and stop your cut.
Knife Blade: This preset is programmed to cut 14 times! You won’t need that many, so you’ll have to be diligent about pausing the cut after 2 passes to check the cut. A newer blade will need 2 passes. A duller blade might need 3. Press the “C” button again to continue the cut. Repeat as needed for a clean cut. Warning- the Knife Blade can damage the mat if left unattended for more cuts than needed.
Deep Blade: The Cricut will cut 2 passes and will stop. Don’t unload the mat unless you are happy with the cut. If you aren’t satisfied with the cut depth, press the “C” button for one more pass. You can as many cut passes as you need.
All Done!
When you have checked the cut and are happy with the result, press the double arrow button to unlad the mat. Carefully remove the foam from the mat and revel in your perfectly cut foam!
Congratulatioins! You now know how to cut two popular types of EVA foam with two kinds of blades with your machine. Go forth and create all the things!
Follow Popverse for upcoming event coverage and news
Find out how we conduct our review by reading our review policy
Let Popverse be your tour guide through the wilderness of pop culture
Sign in and let us help you find your new favorite thing.


Comments
Want to join the discussion? Please activate your account first.
Visit Reedpop ID if you need to resend the confirmation email.